Backing up a Windows Server (WS) installation for disaster recovery has always been a thorn in my side. As critical as backups are in any infrastructure, I’m surprised there doesn’t exist a more robust and flexible built-in backup solution for Windows Server. The current backup tool hasn’t changed since Server 2008 and requires dedicated disks/volumes to create backups with revisions. While you can configure backups with an SMB share destination, each execution generates a full backup that completely overwrites the previous one- hardly an ideal solution.
What’s more, WS backups are designed for “bare metal” recovery, meaning administrators must supplement them with a traditional backup solution that allows them to cherry pick files for recovery in a quick and easy way. Thankfully, there are lots of ways to implement traditional, file-based backups. These solutions often use super accessible SMB shares as destinations which can be hosted on a NAS, a second Windows server, or a Linux server.
Wouldn’t it be nice if we could leverage the abundant and accessible SMB network storage for housing WS backups with revisions? Well, there is a way to accomplish this, but it requires adding an extra layer of abstraction on top of the SMB share.
Prerequisites
Here’s what you’ll need to get started that I won’t be covering in this post:
- A SMB or Samba server with enough storage for your WS backup with revisions.
- A robust network connection to this share, ideally 1Gbps or faster.
- Windows Server 2008 or newer with the Windows Server Backup role installed
Virtual Hard Disks
Windows has the ability to mount virtual hard disks that behave like direct-attached volumes. VHDs are simply specially-formatted files that can live just about anywhere including an SMB network share. We can configure WS backups to utilize this network VHD, enabling us to get the backup data off the local server for disaster recovery.
Creating and attaching a VHD is fairly simple. While you can utilize the Disk Management feature in Windows, I’m going to use the CLI-based ‘diskpart’ utility instead since we’ll need to use it several times throughout this post.
We start by opening an elevated CMD or Powershell terminal.
C:\>diskpart

Microsoft DiskPart version 6.3.9600
Copyright (C) 1999-2013 Microsoft Corporation.
On computer: SERVER

DISKPART> create vdisk file=\\smbserver\vhds\wsbackup.vhdx maximum
=200000 type=expandable
  100 percent completed
DiskPart successfully created the virtual disk file.

DISKPART> attach vdisk
  100 percent completed
DiskPart successfully attached the virtual disk file.

DISKPART> create partition primary
DiskPart succeeded in creating the specified partition.

DISKPART> format quick label=OnsiteBackup fs=ntfs
  100 percent completed
DiskPart successfully formatted the volume.

DISKPART> assign letter=G
DiskPart successfully assigned the drive letter or mount point.

DISKPART> exit
The above commands are relatively straight forward: create a 200GB vDisk on a network share, format it, and assign a drive letter. By default, ‘diskpart’ will create a VHDX disk, a newer vDisk format with improved resiliency and better expandable performance. If you want to squeeze as much performance as possible out of this setup, make a ‘type=fixed’ disk instead of ‘type=expandable’, though I believe performance gains will be negligible.
Configuring the Backup
Next, we can use the Windows Server Backup GUI utility or the ‘wbadmin’ CLI utility to create a backup schedule. I’ll use the GUI tool as it makes creating and reviewing a backup schedule very easy; I find the CLI tool to be cumbersome, not to mention each version of Windows requires slightly different arguments. Launch the tool by hitting the trusty Win key and searching for ‘Windows Server Backup’.
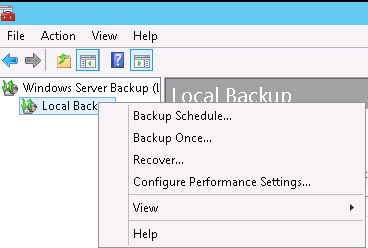
Once the tool loads, right-click on ‘Local Backup’ in the left pain and select ‘Backup Schedule…’
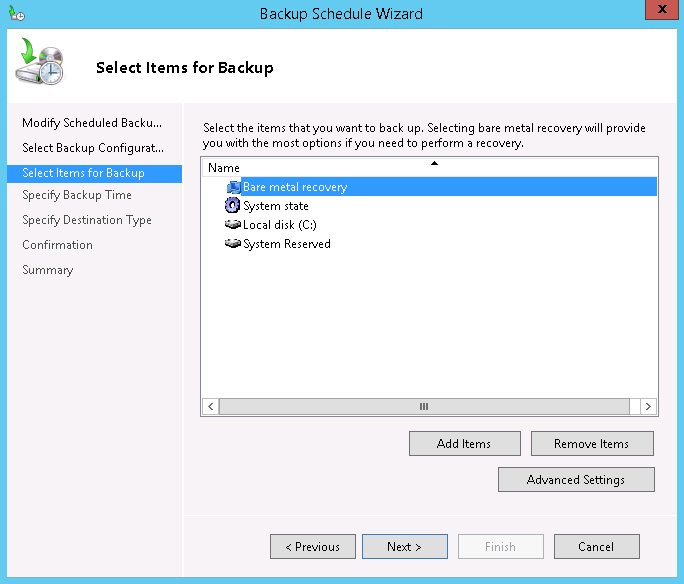
After the ‘Getting Started’ screen, you’ll need to pick a ‘Backup Configuration’, either ‘Full Server’ or ‘Custom’. A full server backup will duplicate all data on all drives. If you wish to exclude some drives, select ‘Custom’ and pick what you’d like to backup.
At a minimum, you’ll need these options for almost any server to create a bare metal backup.
Next, you’ll need to specify a backup time or times. Generally, you’ll want to schedule backups when your server is not very busy and data is not changing very often.
After scheduling, you’ll need to select a destination type. While using a dedicated disk is recommended, it’s not the best for a vDisk mounted over the network as it hides and reformats the drive, making it a bit harder to work with.
Instead, you should choose ‘Backup to a volume’ as it gives you more control and transparency when it comes to mounting and unmounting the VHD, something we’ll be doing later on.
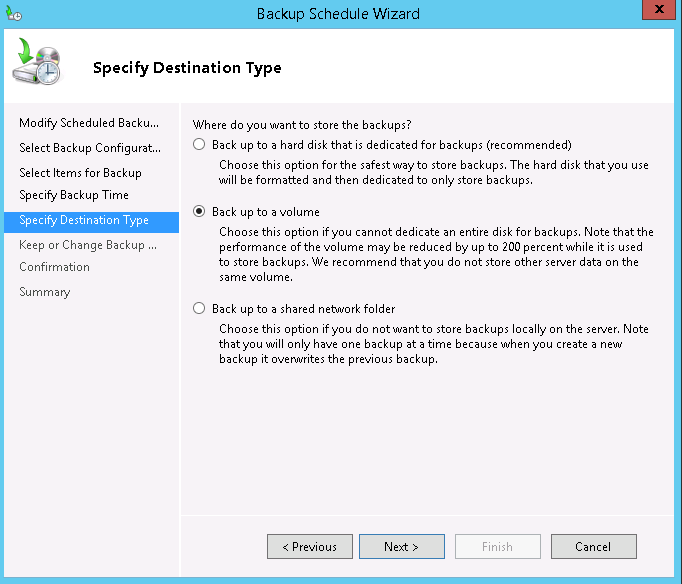
Next, you’ll need to select a volume. Pick the ‘G:’ drive we created earlier. Click ‘Next’.
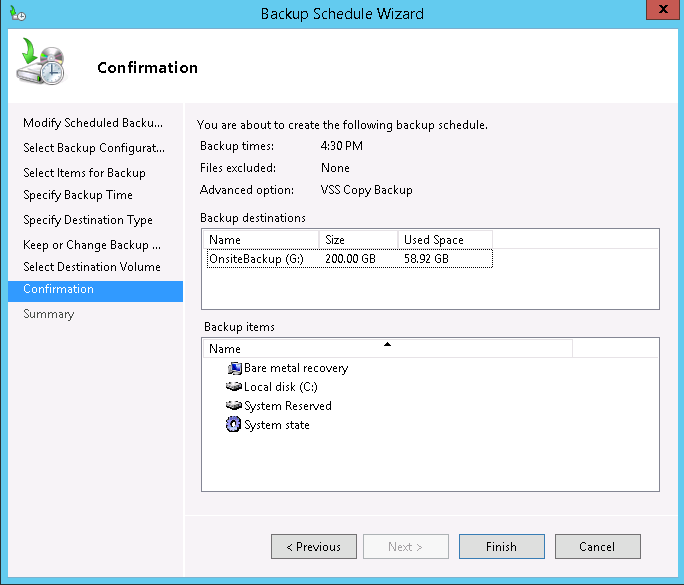
Finally, you’ll see the summary screen. Review your backup setup and click ‘Finish’ if everything looks good!
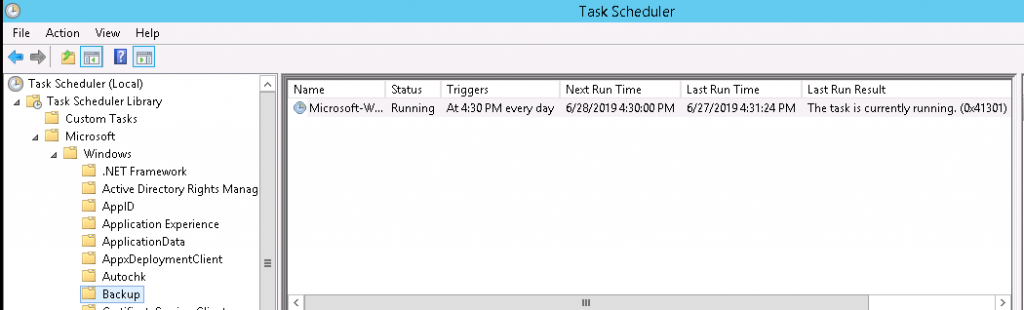
Once you’re done with the backup wizard, a scheduled task will be created.
Which brings me to one of the downsides* of using the GUI backup utility: anytime you modify your backup, the current scheduled task will be overwritten with a new one. This is only a problem if you choose to modify this task in the following steps. Just be aware that modifying your backup job will overwrite this scheduled task. As an alternative, you could create a script that uses ‘wbadmin.exe’ to execute your backup; just create your own scheduled task to handle the execution.
Automatically Mounting VHDs
The second biggest problem with using a vDisk for a backup destination is mounting it (the biggest problem comes later). There is no built-in way to automatically mount a vDisk after a reboot, so we need our own solution. Thankfully, we can use familiar tools to get the job done; choose one of two mounting solutions:
- Mount the vDisk at boot using a scheduled task. Consider adding a 1-minute delay to ensure the network is available.
- Mount the vDisk immediately prior to execution of the backup. This involves modifying the scheduled task that executes your backup. If using this option, you should now understand the relevance of the downside* warning I gave you earlier. Also, be sure to change the executing user from ‘SYSTEM’ to the administrator account or scripts will not execute properly.
No matter which option you use, you’ll need to create a script that mounts your vDisk. First, we create a text file that will contain ‘diskpart’ commands. Call this file ‘attach.txt’ and save it to ‘C:\scripts’.
select vdisk file="\\smbserver\vhds\wsbackup.vhdx"
attach vdisk
exit
Notice that we didn’t assign a drive letter. That’s because Windows will remember the drive letter previously assigned to this disk. Next, we create a BATCH script that will execute these commands. Call it ‘attach.bat’ and save it to the same directory as ‘attach.txt’.
%WINDIR%\system32\diskpart.exe /s C:\scripts\attach.txt
timeout /t 10 /nobreak > NUL
I like to mount my vDisks at boot. When I’m working on the server, I can easily check to make sure my backup device is present and I can setup monitoring software to check for attached vDisks. If the vDisk is missing, I’ll get an alert and can correct the situation. Alternatively, you can prepend your backup’s scheduled task with the mounting script so it’s executed immediately before the backup runs. Just remember the downside* to this method.
Unmounting VHDs
Unmounting your backup vDisk is the biggest problem. Like mounting, there is no way to unmount the vDisk automatically before a reboot. I’ve tried using shutdown scripts and event-based scheduled tasks but neither worked for me.
But why do we need to worry about unmounting anyway? Well, it turns out that if you reboot your server without unmounting your network-based vDisk first, subsequent mount attempts will fail. I can only guess at the reason for this, but I suspect that a stale lock is left on the SMB server causing Windows to think the vDisk is still in use:
Failed to add device '\\smbserver\vhds\wsbackup.vhdx'. Attachment failed to open because of error: 'The process cannot access the file because it is being used by another process.'To recover from this situation, restart the SMB/Samba service on the network storage server.
The preventative solution for this is painfully simple: always unmount your network vDisk before rebooting your server. There’s a couple different ways you can achieve this but I like to create a custom reboot/shutdown script called ‘myhalt.bat’.
@ECHO off
cls
:start
ECHO.
ECHO What would you like to do?
ECHO 1. Reboot
ECHO 2. Shutdown
ECHO 3. Exit this script
set choice=
set /p choice=Enter your choice:
ECHO Your choice:
if not '%choice%'=='' set choice=%choice:~0,1%
if '%choice%'=='1' goto reboot
if '%choice%'=='2' goto shutdown
if '%choice%'=='3' goto end
ECHO "%choice%" is not valid, try again
ECHO.
goto start

:reboot
C:\scripts\detach.bat
shutdown.exe /r /t 00
goto end

:shutdown
C:\scripts\detach.bat
shutdown.exe /s /t 00
goto end

:end
exit
The script ‘detach.bat’ should look like this.
%WINDIR%\system32\diskpart.exe /s C:\scripts\detach.txtI can execute ‘myhalt.bat’ from a terminal or place a shortcut to it on the Desktop. Still, this is a solution with a caveat: if the server experiences power failure or someone forgets to use this custom script, I have to intervene before the next scheduled backup job. That’s why having an effective monitoring solution that checks for the presence of the backup vDisk is important.
Summary
What I like the most about this solution is that it utilizes an existing technology to get the job done. Pretty much anyone managing Windows desktops or servers is going to have an SMB share setup, or spend very little time configuring one if it doesn’t yet exist.
Still, this backup solution is not right for everyone. If you have servers with large amounts of data, utilizing something more performant like a SAN or direct-attached storage might be necessary to avoid lengthy backup processes.